
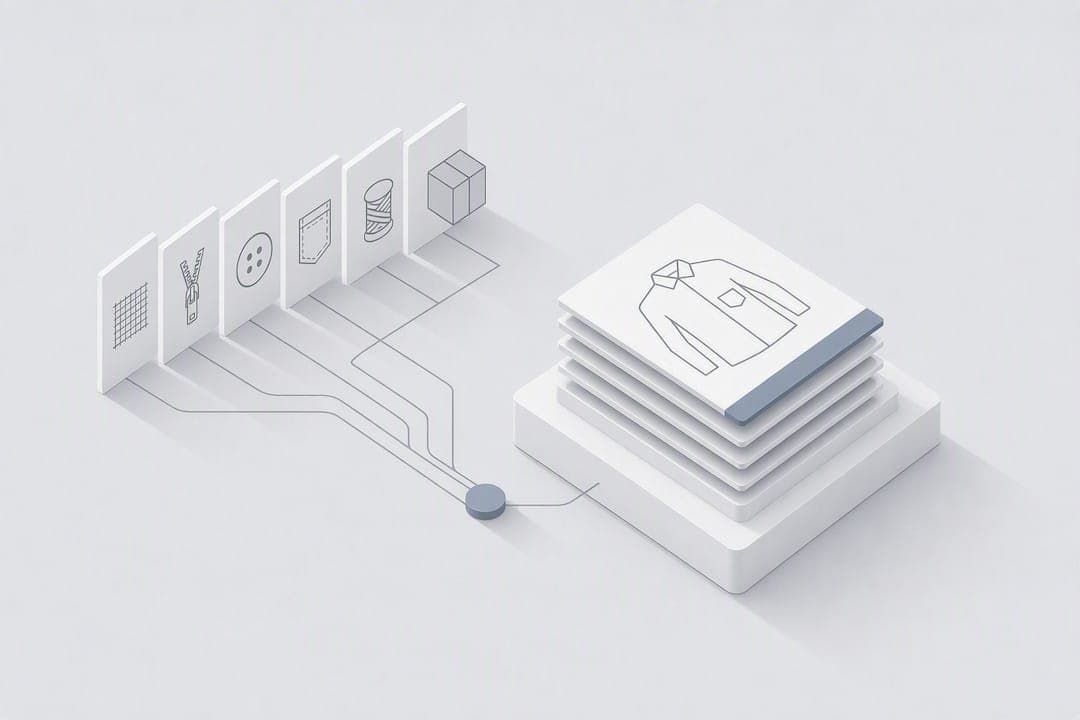
A tech pack is the production brief a factory follows to cut, sew, finish and pack a garment exactly as designed. Building one factory-ready means working through seven steps in order: cover page, flat sketches, bill of materials, measurement spec, construction detail, artwork and packing, then a final consistency check, as explained in this guide on how to start a shoe brand. The output is always two files, a factory-ready PDF and an editable master with version control, so nothing gets built from a stale copy.
TL;DR:
- Accurate version control with clear style IDs, season, and date is essential to prevent factory mistakes and ensure the correct tech pack is used at all times.
- Flat sketches must include multiple views, detailed callouts, and high-resolution vector files to avoid ambiguity and costly sampling errors.
- The bill of materials must encompass all trims, supplies, and alternatives, with explicit substitutions to avoid unbudgeted delays or costs during production.
- The measurement spec should specify base size, method, units, tolerances, and grade rules to guarantee proper fit and avoid multiple correction rounds.
- Final comprehensive cross-checks between flats, BOM, and measurement specs prevent contradictions and reduce production disputes.
Table of Contents
- What goes into a tech pack that factories actually use
- Step 1: build the cover page and version control system
- Step 2: draw flat sketches with clear factory callouts
- Step 3: assemble the bill of materials for every colourway
- How do I write a measurement spec with tolerances?
- Step 5: specify construction, seams and stitch details
- Step 6: document artwork, labelling and packing requirements
- Step 7: run a final consistency check before sending to the factory
- Modern tech pack workflows: templates and where automation helps
- Turning a garment idea into a factory-ready pack faster
- Sources
- FAQ
What goes into a tech pack that factories actually use
A tech pack that gets misread costs you a sampling round, and sampling rounds cost weeks. Factories work from what's written down, not what you meant, so completeness at every stage is what separates a smooth first sample from three rounds of corrections.
Five components show up in every usable pack:
- Cover page and metadata — style ID, season, colourway, version number and owner, so nobody builds from an outdated file.
- Flats with callouts — the visual reference that replaces a thousand words of description.
- Bill of materials (BOM) — every fabric, trim, and component that determines cost and sourcing.
- Measurement spec (POMs) — the numbers that control fit, with tolerances and grading.
- Construction, artwork, labelling and packing — where most bulk-production defects actually originate.
Treating the tech pack as an operational contract rather than a design mood board changes how factories respond to it. Manufacturing teams that hold suppliers accountable to a documented spec see fewer disputes over what was "supposed" to happen, because the pack itself is the reference both sides agreed to.
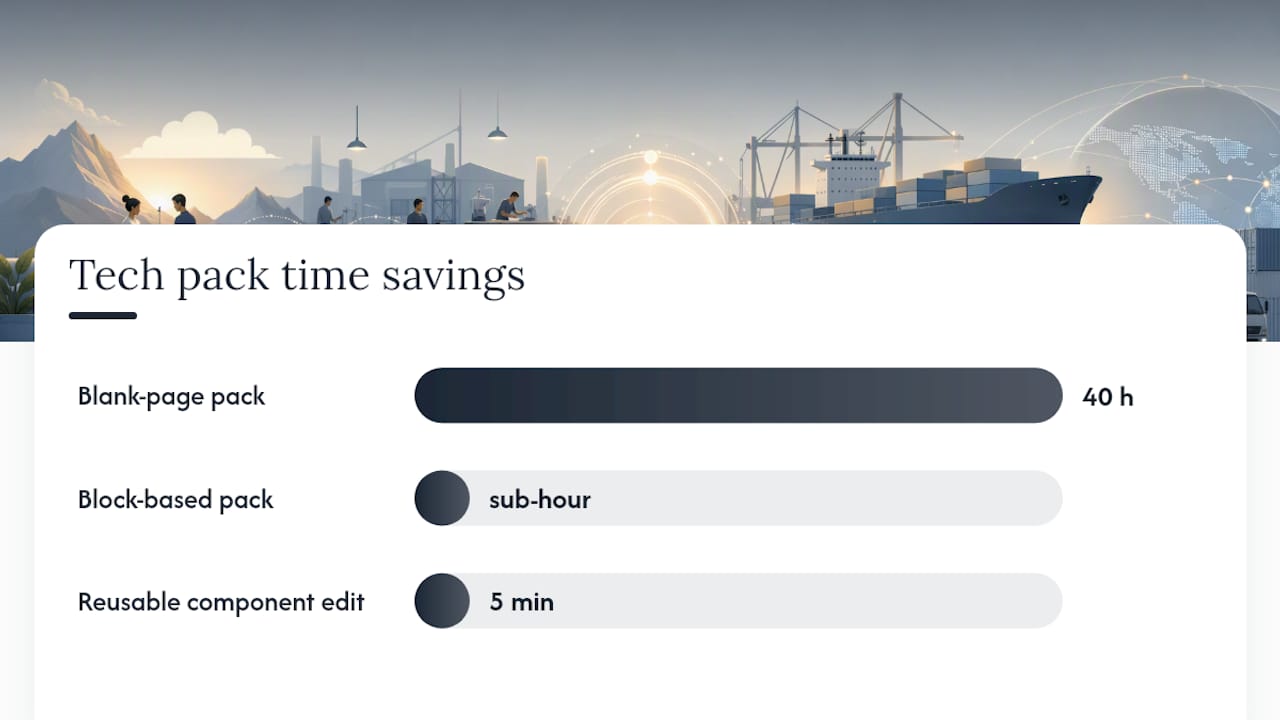
Time investment varies enormously depending on your starting point. A brand-new style built from a blank page can take 20 to 40 hours to document fully, while a style built on an existing block, using saved templates, can take under an hour. That gap is almost entirely down to reusable component libraries, not raw effort.
Step 1: build the cover page and version control system
Start with the page factories check first: identity and revision status. Get this wrong and every downstream document is ambiguous.
Include these fields as a minimum:
- Style ID and style name
- Season and delivery date
- Colourway code (matched to Pantone references in the BOM)
- Version number and date stamp
- Pack owner (the person authorised to approve changes)
- Target FOB (free on board) cost, if pricing is locked
Use a simple versioning scheme: V1.0 for the first factory submission, V1.1 for a minor correction, V2.0 for a structural change like a new seam or fabric. Date every version so a factory can never mistake an old email attachment for the current spec.
Keep one editable master file, whether that's a design tool, a spreadsheet, or a PLM system, and export a locked, read-only PDF for the factory. This keeps a single source of truth that reflects the live record rather than a snapshot someone forgot to update.
Pro Tip: Name your exported PDF with the version number in the filename itself (e.g. "Style204_V2.1_FactoryCopy.pdf"). Email threads get messy fast, and a factory worker searching a folder should never have to open a file to check which version it is.
Step 2: draw flat sketches with clear factory callouts
Flats are the drawing a machinist actually looks at while cutting and sewing, so ambiguity here is the single most common cause of a wrong first sample.
Cover these views as standard:
- Front flat, back flat, and side view where silhouette matters
- Detail insets for pockets, plackets, cuffs, collars or any non-obvious construction
- Close-ups of anything asymmetric or unusual, shown at a larger scale than the main flat
Annotation follows simple rules: use pointer lines from the callout label to the exact point on the garment, keep labels outside the silhouette so they don't obscure the drawing, and add reference dimensions only where a measurement genuinely clarifies proportion (a placket length, a pocket depth). Avoid cluttering a flat with every POM. That's what the measurement spec is for.
Export flats as vector files, PDF or AI, so factories can zoom in without pixelation. Include a high-resolution flattened image as backup for viewers that don't handle vector layers well. A blurry flat sketch is functionally the same as no flat sketch at all.
Step 3: assemble the bill of materials for every colourway
The BOM is where cost, sourcing and production timing all converge, and it needs a column structure a factory can quote against without asking follow-up questions.
Build each BOM row with these fields:
- Material (e.g. main body fabric, lining, interfacing)
- Fibre content and weight (GSM)
- Colour reference using Pantone or an equivalent standard colour system
- Supplier and SKU, where known
- Consumption per unit, in metres or the relevant unit
- Approved alternates or substitutes, clearly marked as such
Omitting trims, thread, and packaging materials is a common and expensive mistake. Guidance on production-ready packs consistently flags thread, interfacings and packaging as items that get left off, then surface as unbudgeted costs or delays once the factory starts sourcing. If a component touches the finished garment, whether that's a zip pull, a hangtag string, or a poly bag, it belongs in the BOM.
Record substitutions explicitly. If your first-choice fabric is unavailable, note the approved backup and the conditions under which the factory may switch, rather than leaving that decision to whoever is on the cutting floor that day.
How do I write a measurement spec with tolerances?
The measurement spec, often called the POM sheet (points of measure), is what stops a "correct-looking" sample from actually fitting wrong. Work through it in this order:
- Choose a base size. Pick the size you'll grade from, typically a middle size in your range, and measure every POM on that size first.
- List each point of measure with its method. Chest width measured 2.5cm below armhole, for example, not just "chest".
- Set units and consistency. Decide centimetres or inches for the whole document and never mix them within one spec.
- Add tolerances to every measurement. A typical woven garment might carry a tolerance of plus or minus 0.5cm on small measurements and up to 1cm on larger ones like body length.
- Attach grade rules. State how each POM changes size to size, so the factory's pattern grader isn't guessing at proportional increments.
For unfamiliar POM definitions or measurement methods, referencing recognised ISO standards for garment measurement gives both sides a shared vocabulary instead of relying on brand-specific shorthand that a new factory partner has never seen.
Step 5: specify construction, seams and stitch details
Construction notes are where experienced factories stop guessing and start following. This is also where vague packs cause the most rework, because "standard seam" means something different in every factory.
Cover these details for every seam and closure:
- Seam class (e.g. plain seam, flat-felled, French seam) using standard construction terminology
- Stitch density, expressed as stitches per inch (SPI)
- Thread type and weight
- Seam allowance in centimetres or inches
- Finishing method (overlock, bound, pinked)
Note any machine or process constraints explicitly, such as a bar tack required at stress points, or a topstitch that must run at a specific distance from the edge. If a construction method is unusual, don't rely on a written description alone.
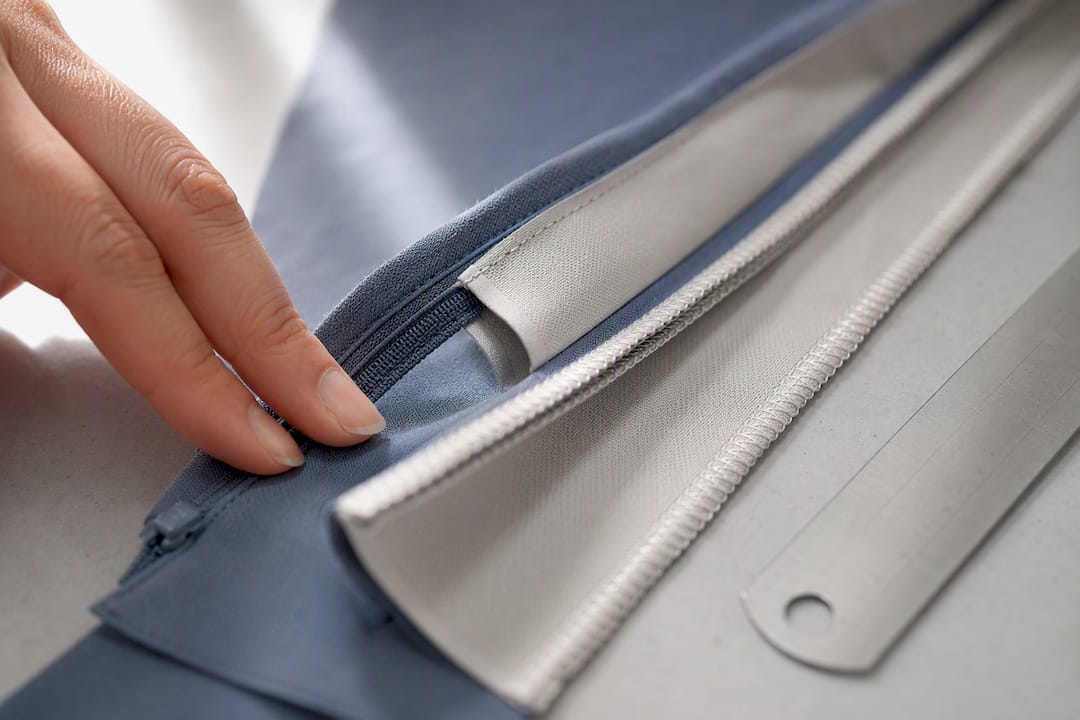
Pro Tip: Add an annotated close-up photograph or drawing for any non-standard assembly, like a hidden zip or a reversible seam. A single labelled image often communicates more accurately than three paragraphs of construction notes, and it removes the ambiguity that written specs alone tend to leave behind.
Step 6: document artwork, labelling and packing requirements
This step protects you from three separate failure points: misplaced prints, non-compliant labels, and cartons that don't match your fulfilment setup.
Specify these details clearly:
- Artwork placement, dimensioned from a fixed reference point (e.g. 8cm below the neckline seam, centred)
- Print or embroidery method (screen print, DTG, flat embroidery) and thread or ink colours by Pantone reference
- Care labelling, including wash symbols and fibre content, matched to the country or countries you intend to sell into
- Country-of-origin labelling, noting the target market since legal requirements vary by jurisdiction and are worth checking with a compliance professional rather than assuming
- Packing specification, covering fold method, polybag type, carton configuration, and hangtag placement
Care and origin labelling deserves particular attention because it's a legal requirement in many markets, not a style choice, and the rules differ depending on where the garment will actually be sold.
Step 7: run a final consistency check before sending to the factory
The last step catches contradictions between sections before they reach the cutting table, and it's the step most small brands skip under deadline pressure.
Work through this sequence:
- Cross-check flats against the BOM. Every material called out on a flat sketch should have a matching BOM line.
- Cross-check flats against the POM sheet. Every dimension shown on a flat should correspond to a listed measurement point.
- Confirm which values are requirements versus references. Best practice is to label each item explicitly as a binding requirement or a non-binding reference, so a factory never silently defaults to their own interpretation of an ambiguous note.
- Log open issues with an owner and a date. If a colour is still being confirmed, write that down rather than leaving a blank the factory might fill in themselves.
- Confirm the factory has reviewed the pack. A minimum release check should verify the recipient has actually read the document and flagged anything outside their capability, before production starts.
Pro Tip: Keep a running revision log on the cover page itself, one line per version, noting what changed and why. When a factory calls asking "did the seam allowance change between V1.2 and V2.0", you want the answer in seconds, not buried in an email chain.
Modern tech pack workflows: templates and where automation helps
Component libraries change the maths on tech pack creation more than any other single habit. Once you've built a properly annotated cuff, pocket or collar callout, reusing it across future styles turns a repetitive two-hour task into a five-minute copy-and-adjust job. That's the real time saving behind the gap between a 40 hour blank-page pack and a sub-hour block-based one, and it's worth building your own library from the first style onward, not the fifth.
There's a place for factory-authored packs, typically on very simple styles with an established supplier relationship and low fit risk. But once your brand has its own fit standards, proprietary construction details, or multiple factories producing the same style, brand-authored control stops being optional. A factory's version of "your" tech pack reflects their default assumptions, not yours, and that gap shows up in inconsistent fit across production runs.
Software that generates flats, BOMs and structured specs from a written description is a genuine shift for anyone without in-house technical design capacity, though it works best as a strong first draft you refine rather than a finished factory submission.
— WOVA Editorial Team
Turning a garment idea into a factory-ready pack faster
Building all seven sections by hand in a spreadsheet is entirely doable, and plenty of established brands still do it. But if you're starting from a blank page with no technical design background, that 20 to 40 hour build time per new style is a real bottleneck, not an exaggeration.

There are platforms built to address that gap. By describing a garment in a few sentences, such platforms can generate a professional design concept alongside a manufacturer-ready tech pack, complete with flats, BOM structure and specification detail, without requiring prior knowledge of fashion technical drafting. It won't replace the judgement calls a construction step or a fit tolerance genuinely needs, and factory review remains essential regardless of how a pack was drafted. But as a starting point that turns a rough concept into a structured document in minutes rather than days, it's a meaningful shortcut. Visit Wovaai to generate your first draft tech pack and see how much of that groundwork it covers before you sit down to refine the details yourself.
Sources
- How To Create A Tech Pack To Send To Manufacturers (2026) - Shopify
- What a Tech Pack Is: A Controlled Product Definition | Stitch Authority
FAQ
How do I create my own tech pack from scratch?
Work through the seven steps in order: cover page with version control, flat sketches with callouts, a full bill of materials, a measurement spec with tolerances, construction details, artwork and packing instructions, then a final consistency check before sending it to a factory.
Can ChatGPT create tech packs?
General-purpose AI chat tools can help draft text sections like construction notes or a BOM outline, but they can't produce the vector flats, structured specification tables, or Pantone-referenced colour data a factory needs. Purpose-built platforms like Wovaai are designed specifically to generate that manufacturer-ready structure from a written description.
What should I include in a tech pack?
At minimum: a cover page with style ID and version number, flat sketches with annotated callouts, a bill of materials covering every fabric and trim, a measurement spec with tolerances and grade rules, construction and stitch details, and artwork, labelling and packing instructions.
What does a tech pack look like?
It's typically a multi-page PDF, one section per page or set of pages, starting with a cover sheet, followed by labelled flat sketches, a BOM table, a POM measurement table, construction notes, and artwork or packing diagrams, exported from a single editable master file.
How long does it take to build a tech pack?
A completely new style built from a blank page can take 20 to 40 hours to document properly, while a style built from an existing block or template can take under an hour.