
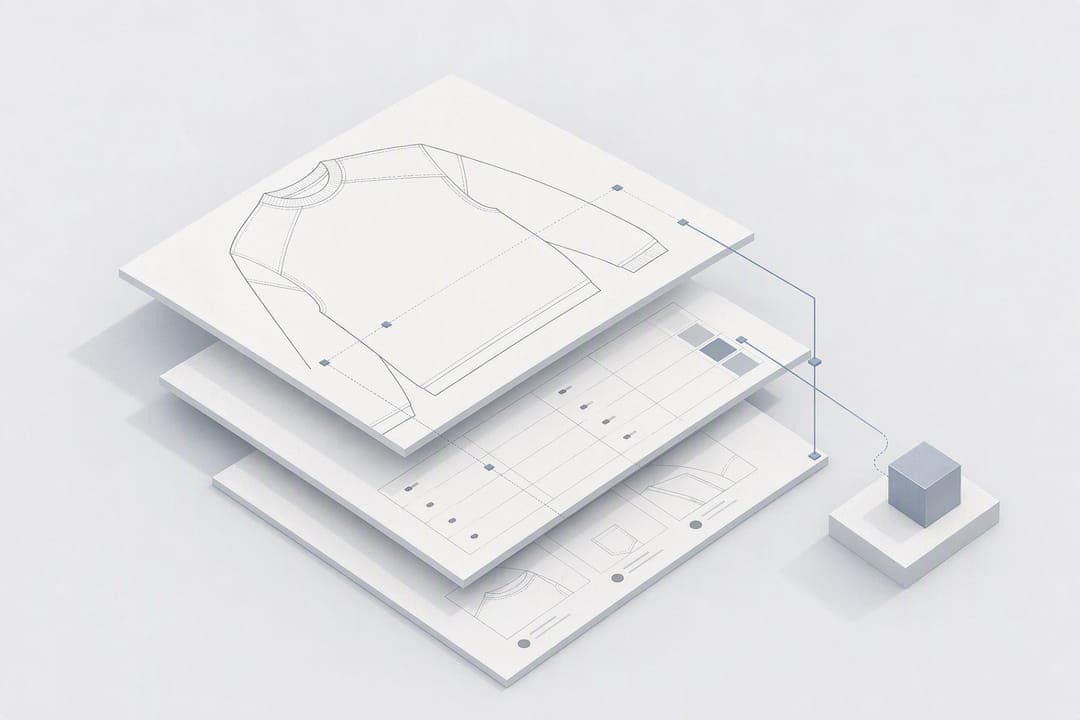
A tech pack is the single PDF a factory uses to make your first sample: flats, a bill of materials, and a measurement spec with tolerances, backed by construction notes. Turning a clothing design into a tech pack means building three pages first: technical flats, the BOM, and the points of measure, then wrapping them with construction detail and file versioning. Get those right and you walk away with an accurate first-fit sample and a quote you can actually trust.
TL;DR:
- A well-structured tech pack requires precise measurement points, clear construction notes, and detailed BOMs to prevent factory assumptions and ensure accurate samples.
- Using vector files and printing flats at scale helps factories interpret the designs correctly and reduces back-and-forth delays.
- AI tools can expedite initial drafting by generating flats and BOM outlines from descriptions, but humans must verify tolerances, stitching, and construction details.
- Developers should prioritize locking measurement specifications and BOM details before refining artwork to avoid costly reworks.
- Organizing all files into a single, versioned PDF with corresponding source files prevents errors and streamlines communication with factories.
Table of Contents
- How do you turn a clothing design into a tech pack?
- Preparing flats and artwork factories can use without guessing
- What goes into a factory-ready bill of materials?
- Setting points of measure, tolerances and grade rules
- Writing construction notes that stop factory guesswork
- How do you check a first-fit sample and manage revisions?
- How should you name, structure and share the final files?
- Where AI speeds the process, and where it doesn't
- A practical workflow for designers, not a theory exercise
- Try Wovaai for an AI-assisted route from sketch to tech pack
- Sources
- FAQ
How do you turn a clothing design into a tech pack?
Building a tech pack is a sequence, not a single document you write in one sitting. Miss a step and the factory fills the gap with its own assumption, which is rarely the one you wanted.
Here's the order that works, based on the seven-step workflow most manufacturers expect:
- Gather references. Collect your sketch, any reference garments, and a base size to measure against.
- Draft the flats. Create flat technical drawings, front and back, then annotate every construction detail.
- Build the BOM. List every fabric, trim, and colour reference with exact codes, not descriptions.
- Set the POM and grade rules. Define each measurement point, its tolerance, and how it scales across sizes.
- Write construction notes. Detail stitch types, seam allowances, and finishing for each garment section.
- Evaluate the first-fit sample. Check it against your spec and log every deviation.
- Assemble and version the master file. Combine everything into one numbered PDF ready to send.
A few habits make this faster the second time round:
- Keep a single working folder per style, not scattered files across email threads.
- Name your base size clearly on every page so nobody grades from the wrong reference.
- Save flats as a separate layer from annotations, so you can update either without redrawing.
Most emerging brands lose time reworking flats after the BOM changes. Do steps 2 and 3 together where you can. A colour swap often means the trims need updating too.
Preparing flats and artwork factories can use without guessing
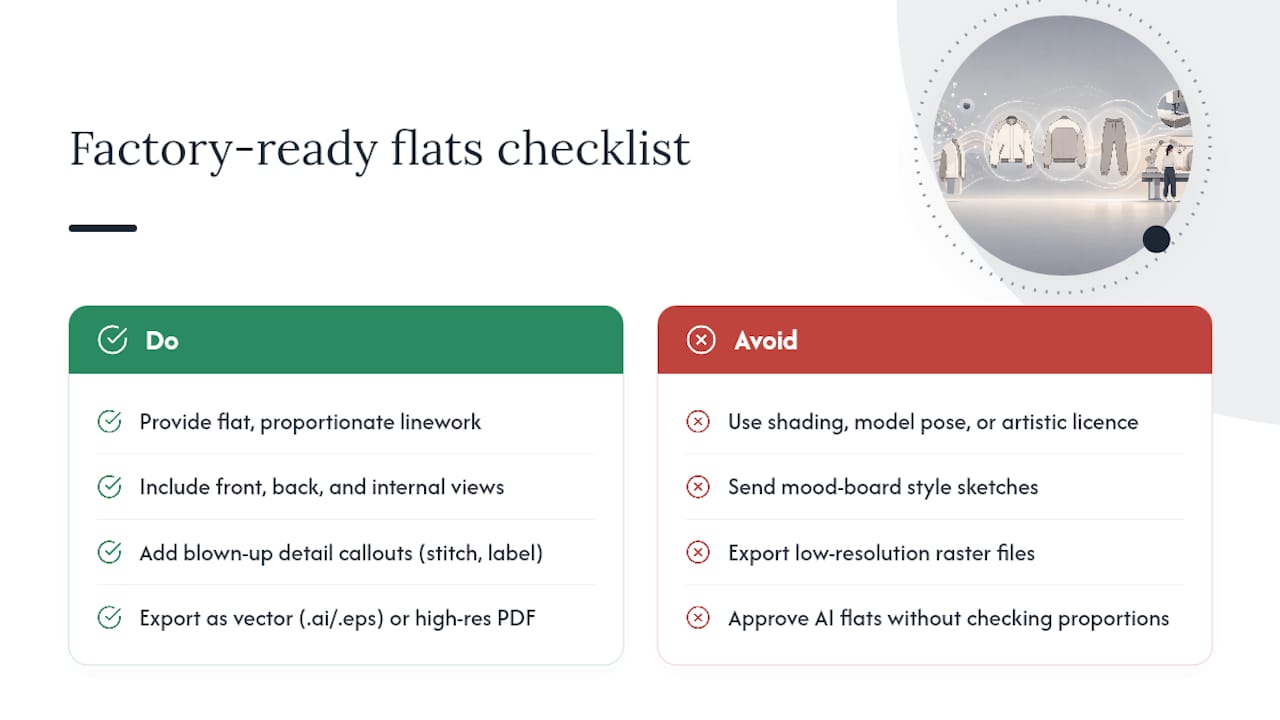
Technical flats are not fashion illustrations. A pattern maker needs flat, proportionate linework, no shading, no model pose, no artistic licence. If your flat looks like a sketch from a mood board, it will get sent back with questions, and you'll lose days waiting on a reply.
Every flat page needs a front view, a back view, and any internal views that show construction a factory can't guess from the outside, a hidden pocket bag, an interior facing, a specific closure. Blown-up detail callouts matter more than people expect: a zoomed circle showing exact topstitching width or a label placement saves a dozen back-and-forth emails.
For file formats, factories consistently work best from vector files (.ai or .eps) or a high-resolution PDF, since these hold their line quality at any zoom level. When exporting, check your canvas dimensions against standard paper sizing references to avoid flats that print cropped or scaled oddly.
AI tools can now generate a serviceable first-pass flat from a photo or a written description. That's a genuine time saver, but always check proportions, seam lines, and closures by eye before you approve one for the pack.
Pro Tip: Print your flats at actual scale before finalising the pack. Details that look fine on a screen sometimes vanish or blur once printed at the size a pattern cutter actually works from.
What goes into a factory-ready bill of materials?
The BOM is where vague language costs you money. A tech pack's bill of materials needs to specify exactly what to buy, not describe it loosely enough that the factory substitutes something cheaper or simply wrong.
Every row needs these columns, at minimum:
- Item and placement (main fabric, lining, main label, care label, zip, buttons).
- Description and composition (100% cotton jersey, not "soft cotton").
- Weight or GSM, since this affects drape and cost.
- Supplier reference or swatch ID, where you have one.
- Exact colour code using Pantone references rather than a colour name like "navy."
If you don't have a confirmed mill yet, don't leave the row blank. Give a target GSM, fibre content, and a photographed swatch, so the factory can propose a close match and quote a realistic lead time. Specify trims down to size and finish: an 18mm matte gold button reads very differently to the factory than "gold button." Attach swatches and artwork files directly in the pack rather than describing them in prose.
Setting points of measure, tolerances and grade rules
The points of measure (POM) table is the part of the tech pack most beginners underestimate. It's not just a size chart, it's the enforceable contract that decides whether a finished garment is accepted or rejected.
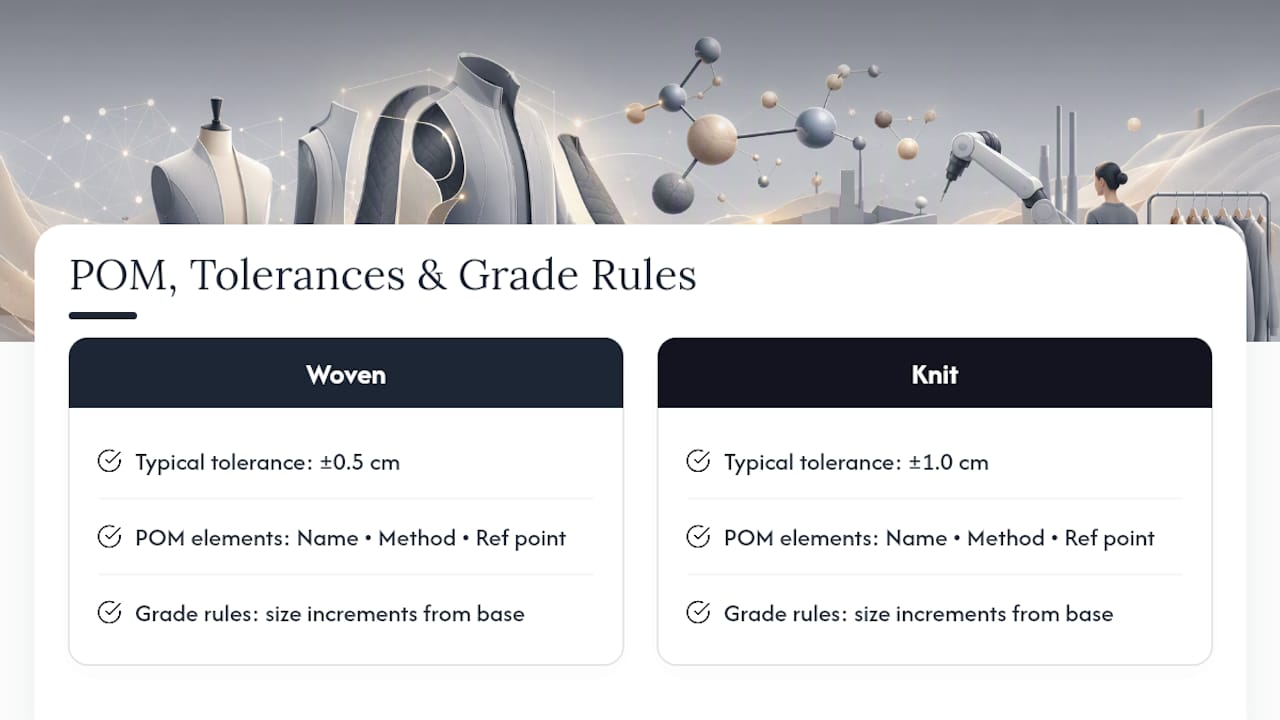
Each POM needs a name, a measurement method, and a reference point. "Chest width, measured flat, 1 inch below armhole" is a specification. "Chest" on its own is a guess. Standards such as ASTM D5219 exist precisely to standardise this naming so a factory in another country reads it the same way you meant it.
Tolerances then define how much variation is acceptable. Wovens generally run tighter, often ±0.5cm on critical points like shoulder width, while knits, which stretch and recover, can usually take ±1cm without affecting fit. Grade rules define how each measurement increases or decreases between sizes from your base size.
Pro Tip: Never leave a tolerance blank. An unstated tolerance is a tolerance the factory chooses for you, and that's usually how a sample gets rejected on arrival rather than fixed before it's cut.
Writing construction notes that stop factory guesswork
Construction notes translate your design intent into stitch-by-stitch instruction. Without them, a factory defaults to whatever is fastest or cheapest for them, which isn't always what you drew.
Cover these points for every seam and detail area:
- Stitch type and reference code where relevant (lockstitch, overlock, coverstitch), matched to standard ISO/ASTM seam classifications so nothing gets lost in translation.
- Seam allowance in centimetres or inches, plus topstitching width, at each construction point.
- Bartacks and reinforcement points, especially at pocket corners and stress areas.
- Attachment method for hardware and trims, sewn, riveted, or heat-sealed.
- Exact artwork placement coordinates and, for embroidery, a rough stitch count estimate for costing.
Vague instructions like "finish neatly" invite interpretation. State the actual method.
How do you check a first-fit sample and manage revisions?
Your first sample tells you whether the spec worked or whether something needs correcting before bulk production starts. Treat it as a checklist exercise, not a quick glance.
- Measure the sample against your POM table, point by point, noting any deviation beyond tolerance.
- Check visual construction, seam quality, stitching, label placement, against your flats and notes.
- Run functional tests where relevant, zip pull, closures, stretch recovery on knits.
- Log every deviation with a note and photo, then decide which need correcting versus which are acceptable.
- Issue a revised spec, incrementing the version, v1.0 becomes v1.1, never overwriting the original file.
Only approve for bulk production once measurements sit within tolerance and construction matches your notes.
Pro Tip: Keep every version of the tech pack, never delete an old one. If a dispute comes up later about what was actually specified, the version history is your evidence.
How should you name, structure and share the final files?
A tech pack that lives across six separate documents invites mistakes. The safest approach is one multi-page master PDF for reference, paired with the editable source files (your vector flats, spreadsheet BOM) kept alongside it for future edits.
A workable structure looks like this:
- Folder per style:
StyleName_StyleNumber/ - Master file:
StyleName_TechPack_v1.2.pdf - Source files:
StyleName_Flats.ai,StyleName_BOM.xlsx - Increment the version number every time you issue a revision, and note the change date on the cover page.
When exporting, keep vector layers intact and export flats at a minimum of 300 DPI if rasterising for the PDF. For large asset bundles, cloud sharing beats email attachments, and a short readme noting what's inside each folder saves the factory a confused reply asking where the trims file went.
Where AI speeds the process, and where it doesn't
Wovaai builds tech packs by generating flats and BOM scaffolding directly from a written brief, which cuts hours off the manual drafting stage. That's a genuine shift for anyone without CAD training.
What AI tools handle well is the first pass: rough flats, a populated BOM structure, an initial measurement table. What still needs a human eye is tolerance-setting, exact stitch calls, and construction judgement calls that depend on fabric behaviour and how the garment will actually be worn.
AI can draft the scaffolding of a tech pack in minutes. Whether the tolerances, grading, and construction notes actually hold up in production is still a judgement call only a person can make.
A practical workflow for designers, not a theory exercise
The research behind this guide points to one clear conclusion: designers lose more time to missing detail than to missing talent. A tech pack doesn't fail because the flats look unpolished, it fails because a tolerance was left blank, a colour code was approximate, or nobody versioned the file after a change.
Conventional advice tends to obsess over the visual polish of a tech pack, glossy flats, tidy layout, and treats the measurement spec as an afterthought. That's backwards. A factory can work from a rough flat with a clear callout. It cannot work from a beautiful flat with no tolerance on the chest measurement.
If you're building your first pack, prioritise the POM table and BOM before you spend hours perfecting artwork. Get the numbers locked, then make it look good. AI-assisted tools genuinely help here, they remove the blank-page problem and get a structure on screen fast, but the checking still falls to you. Read every tolerance, question every unnamed fabric, and never send a spec you haven't personally measured against.
— WOVA Editorial Team
Try Wovaai for an AI-assisted route from sketch to tech pack
Wovaai turns a written garment description into professional flats, a structured BOM, and a manufacture-ready tech pack, without requiring CAD training or years of technical drafting experience.

If you've been sketching ideas but dreading the hours of technical drawing and spec-writing that follow, this is the shortcut worth testing. Describe your garment, generate a draft pack, and compare it against a reference garment you already own to sanity-check the measurements before you send anything to a factory. It won't replace your own eye on tolerances and construction calls, but it removes the blank page entirely. Start with a free trial on Wovaai and generate your first sample pack today.
Sources
For further reading, the complete tech pack guide and free template covers page-by-page structure, and the Pantone colour finder is the standard reference for accurate colour specification.
- How To Create a Tech Pack To Send To Manufacturers (2026) - Shopify
- How to Make a Tech Pack for Clothing (2026)
FAQ
How do you make a tech pack for fashion?
You make a tech pack by combining technical flats, a bill of materials, a points-of-measure table with tolerances, and construction notes into one versioned PDF. Most guides recommend building it in that order, since the flats and BOM inform the measurement spec, not the other way round.
What is the 3-3-3 rule for clothing?
The 3-3-3 rule isn't a recognised tech pack standard, and definitions vary depending on where you encounter it, so it's not something to build a spec around. If you've seen it referenced for capsule wardrobes or styling, that's a separate concept from the technical documentation a factory needs.
Can you create a tech pack for free?
Yes, free templates exist covering the standard pages a tech pack needs, flats, BOM, and measurement charts, and you can build one manually in spreadsheet and vector software you already own. The trade-off is time: manual drafting of flats and BOM structure from scratch typically takes considerably longer than using an assisted tool.
Can AI create a tech pack?
AI tools can generate a first draft of flats and BOM scaffolding directly from a written description or photo, which Wovaai offers as its core workflow. The tolerances, exact stitch calls, and construction judgement still need a human check before the file goes to a factory.
How many pages does a tech pack usually need?
A standard garment tech pack typically runs 8 to 15 pages, covering flats, BOM, POM, construction notes, and artwork. Complex garments with multiple components, linings, or hardware often run longer.