
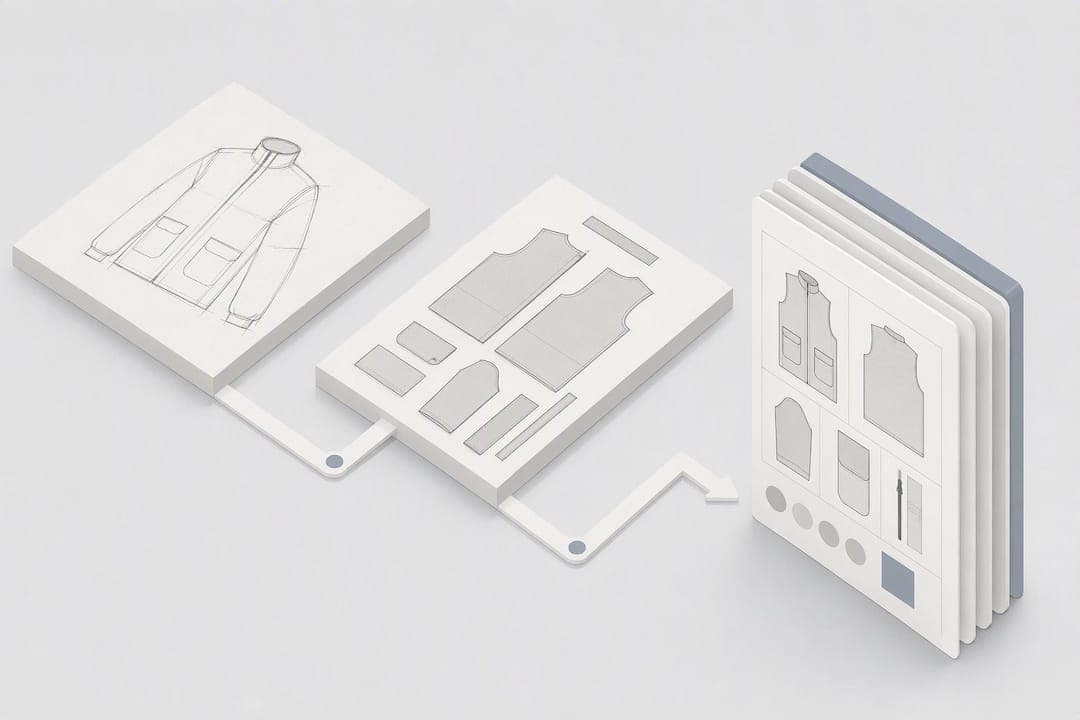
You need two things, not one: a finished design and a complete tech pack. The tech pack has to specify flats, a full bill of materials, points of measure with grading and tolerances, construction notes, colourways using Pantone Fashion, Home + Interiors (FHI) references, labels and packaging, all bundled into one version-controlled PDF. Miss a GSM figure or a tolerance and a factory will either guess wrong or stop and ask, which costs you a sampling round either way.
TL;DR:
- A complete tech pack must include technical flats, a detailed bill of materials, measurement specifications with tolerances, grading rules, construction notes, colorways with Pantone references, labels and packaging details, and revision history in a single PDF.
- Incomplete BOMs or measurement specs, especially missing fabric finish, interfacing weight, or trim codes, cause factory substitutions that lead to delays and inaccurate samples.
- A first-fit review involves measuring and annotating a physical sample, issuing a clear revision log, and approving only after all checkpoints meet specifications to prevent costly reworks.
- AI tools can generate drafts of tech packs from written briefs, but material verification, supplier lead times, and quality testing still require human review before factory submission.
- Creating a muslin before the first fabric sample is essential for catching fit issues early, saving time and costs compared to direct sampling in production fabric.
Table of Contents
- How do I design my own clothes from idea to factory-ready tech pack?
- What goes on each page of a manufacturer-ready tech pack?
- Why do bills of materials and measurements cause most production delays?
- How do I run a first-fit review and keep revisions under control?
- What does AI actually automate in tech pack creation, and what still needs a human check?
- What are the core principles behind a wearable, sellable design?
- What sewing and construction skills does a designer need to know, even when outsourcing production?
- How do I sketch and develop an original design before it's technical?
- How do I choose and source the right fabric for a design?
- How does garment fit work, and do I need pattern-making software?
- Why does making a muslin or sample matter before full production?
- Get the sequence right, or pay for it twice
- Generate your first tech pack draft with WOVA
- Sources
- FAQ
How do I design my own clothes from idea to factory-ready tech pack?
Getting from a sketch to something a factory can actually quote follows a predictable order. Skip a step and you'll find yourself reworking the whole pack after the first sample comes back wrong.
- Collect references and a benchmark garment. Buy or pull a physical sample close to what you're building and measure it flat. Factories can reverse-engineer a pattern from a real garment far faster than from a mood board, which shortens your first sampling round.
- Draft front and back technical flats. These are clean, proportionate line drawings, not fashion illustrations. Add numbered leader lines pointing to every point of measure (POM) so nothing is left to interpretation.
- Build the measurement spec. Pick a base size, list every POM by name, state how each is measured, and attach a tolerance to each figure. This chart becomes the reference every grader and quality controller uses.
- Compile the bill of materials. List fabric composition and GSM, every trim, thread type, hardware, and packaging, with Pantone FHI and supplier codes attached wherever colour or sourcing matters.
- Add construction notes, artwork and packaging, then export one PDF. Stitch types, seam allowances, print or embroidery artwork files, label placement, and folding or bagging instructions all belong in the same document. Name the file with a version number and date, and export it once as a single PDF.
A standard garment's tech pack usually runs 8 to 15 pages, more for complex styles with multiple trims or prints. Most factories won't quote, let alone cut a sample, without the whole document in hand.
What goes on each page of a manufacturer-ready tech pack?
A tech pack works because every page answers a specific question a pattern maker, cutter, or quality controller would otherwise have to ask you directly. Shopify's breakdown of a production tech pack lists flats, BOM, measurement spec, grading, construction, colourways, labels and packaging, and revision history as the core set.
- Technical flats: front and back views plus zoomed insets for pockets, closures, or stitching details, each with a callout number tying it to a spec elsewhere in the pack.
- BOM: fabric composition, GSM, mill or supplier reference, every trim, thread type, hardware piece, and packaging material, each with a Pantone FHI or supplier code where colour matters.
- POM table: the exact name of each measurement, the method for taking it, the base size value, and the tolerance either side of it.
- Grading rules: the increment applied per size step and which sizes the grade covers, so a small run of sizes doesn't get graded on assumptions built for a full range.
- Construction notes: stitch types, stitches per inch (SPI), and seam allowances, ideally referencing recognised ISO stitch and seam classifications so a technician anywhere can apply the right machine setting without a phone call.
- Colourways and artwork: Pantone FHI codes for fabric and trim colour, plus vector artwork files for any print or embroidery, since factories need FHI references rather than print Pantone guides to avoid a colour mismatch at lab dip stage.
- Labels, packaging and revision history: placement diagrams for woven or printed labels, folding and polybag specs, and a running log of every version issued.
Pro Tip: Keep a single master file and increment the version number every time you change a measurement or material. A factory working from an outdated page five while you've corrected page five in your own copy is one of the most common causes of a wrong sample.
Why do bills of materials and measurements cause most production delays?
A BOM only works if it's complete, and completeness means listing things designers often assume are obvious. A complete BOM names the shell fabric's fibre content and GSM, the lining, every trim, the thread, and the packaging because a factory left to guess at thread fibre content or interfacing weight will substitute its own default, and that default won't necessarily match your fabric's drape or durability needs.
Fields that get skipped, and why they matter:
- Fabric finish (peached, brushed, coated) changes hand feel and shrinkage, so leaving it blank invites a factory to pick whichever finish is cheapest to source.
- Interfacing weight and type affects collar and cuff structure; omit it and expect a floppier or stiffer result than intended.
- Thread fibre content matters for stretch fabrics especially, since a polyester thread on a high-stretch knit can snap during wear.
- Trim supplier codes prevent a factory from substituting a similar-looking zip or button that doesn't match your original spec.
Tolerances should differ by fabric behaviour. Wovens generally hold tighter, often around a quarter of an inch at the chest and waist, while knits with more stretch recovery can carry a wider allowance, sometimes half an inch or more depending on the fabric's stretch percentage.
Before sending a pack to a factory, check that every fabric, trim, thread, and packaging line has a supplier reference, a fibre or material description, and a colour code. A complete tech pack reduces sampling iterations precisely because the factory isn't filling gaps with assumptions.
How do I run a first-fit review and keep revisions under control?
The first sample almost never comes back correct on every point. What separates a smooth production run from a stalled one is how tightly you log what's wrong and how clearly you communicate the fix.
- Measure every POM on the physical sample against your spec, photograph the garment on a form or model, and annotate the photos with which measurements are off and by how much.
- Issue a revision log with a clear version number and date, listing exactly what changed from the previous version, not just what's wrong.
- Check fit, construction, trims, and packaging as separate checkpoints rather than approving the whole sample on fit alone; a garment can fit perfectly and still have the wrong zip pull or stitch density.
- Approve only once all checkpoints clear, since a partial approval tends to get treated as a full go-ahead once it reaches the cutting floor.
Each revision round adds lead time and can shift costing if it requires a different trim or more labour, so flag changes early and confirm them in writing with your supplier before the next sample cut begins.
Pro Tip: Ask your factory upfront what Acceptable Quality Level (AQL) they inspect against, and note any certification requirements like OEKO-TEX in the tech pack itself, so quality expectations are agreed before the first cut, not after the first shipment.
What does AI actually automate in tech pack creation, and what still needs a human check?
An AI platform like WOVA can turn a written brief into vector flats, a starting BOM table, and an initial POM mapping in minutes rather than the hours a technical designer would spend drafting the same pages by hand.
What AI output still needs a human eye on it:
- Material verification, since a fabric's actual GSM and hand feel need a physical lab dip or swatch check, not just a spec sheet entry.
- Supplier lead times and minimums, which vary by factory and season and sit outside what any design brief can predict.
- Quality and compliance testing, including AQL inspection and any certification requirements specific to your market.
A workable rhythm looks like this: generate a draft with AI, have a technical designer review measurements and construction notes, send the pack to the factory for a first sample, then run the revision cycle described above until every checkpoint clears.
What are the core principles behind a wearable, sellable design?
Every well-constructed garment rests on four decisions made before a single seam is drawn. Silhouette sets the garment's overall shape against the body, whether that's fitted, boxy, A-line, or draped, and it's usually the first thing a buyer's eye registers from across a rack. Style lines are the seams, darts, and panel divisions that shape the silhouette and can visually lengthen, shorten, or narrow a form depending on where they sit.
Fabric selection has to match the silhouette's demands. A structured blazer shoulder needs a fabric with enough body to hold its shape, while a fluid slip dress needs a drape-heavy fabric like a viscose or silk blend that won't stand away from the body. Choosing a stiff cotton for a design that depends on fluid movement is one of the most common beginner mistakes, and it only becomes obvious once the sample is cut and hanging on a form.
Colour theory governs how colourways read individually and as a range. A capsule collection built around one dominant neutral with two or three accent tones tends to photograph and merchandise better than five unrelated colours competing for attention. This is also where Pantone FHI references earn their place early, not just at the BOM stage, because locking a colour palette before pattern work begins avoids a scramble to match trims and prints later. None of these four decisions works in isolation. A silhouette that ignores what the chosen fabric can physically do, or a style line placed without regard to the body it's meant to flatter, tends to fail at the sample stage regardless of how good the sketch looked.
What sewing and construction skills does a designer need to know, even when outsourcing production?
You don't need to run a factory floor to speak the language factories use, but you do need enough construction literacy to write instructions that survive translation into a different country's sewing room. Seam types are the starting point. A plain seam works for most woven garments, a French seam encloses raw edges for lightweight or sheer fabrics, and a flat-felled seam adds durability to denim and workwear where a raw edge would fray under repeated washing.
Stitches per inch (SPI) is the detail beginners most often skip, yet it changes how a seam behaves under stress. A lower SPI, around 8 to 10, suits stretch knits where too dense a stitch line can restrict movement or pucker the fabric. A higher SPI, closer to 12 to 14, suits structured wovens like denim or canvas where strength matters more than give. Referencing recognised ISO stitch and seam nomenclature when you write construction notes means a factory technician anywhere can match your intent to their machine settings without a clarifying email.
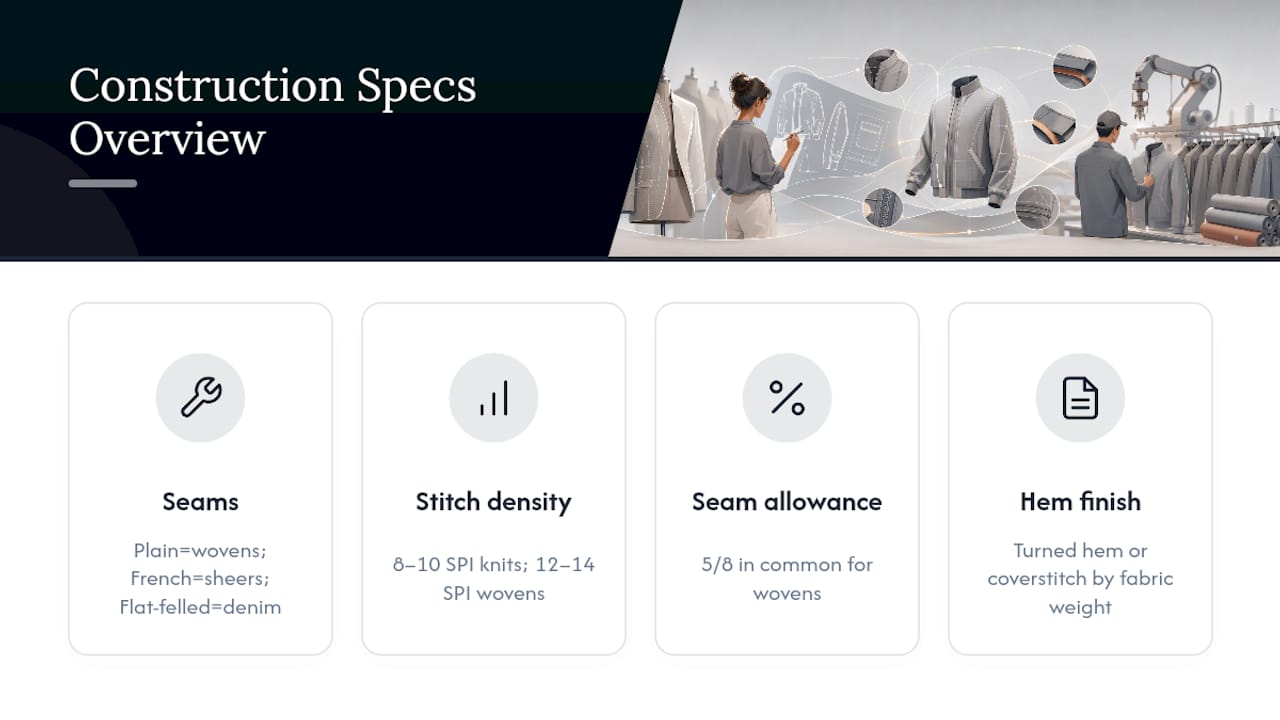
Seam allowance width also needs stating explicitly rather than assumed. Five-eighths of an inch is common for wovens, while some knit constructions run narrower. Hem finishes, from a simple turned hem to a coverstitch, each behave differently on different fabric weights, and specifying which one you want prevents a factory defaulting to whichever is fastest for them to run.
How do I sketch and develop an original design before it's technical?
Every production-ready garment starts life as a rough idea, and the sketching stage is where you decide what that idea actually is before committing to construction detail. Hand sketching still earns its place here because it's fast. A pencil and a croquis, the standardised figure template designers draw over, let you generate a dozen silhouette variations in the time it takes to open design software.
Once a direction feels right, digital tools take over for precision. Vector-based flats need to be drawn to accurate proportion, not stylised the way a fashion illustration is, because these flats become the reference a pattern maker and factory technician both work from. This is where a design brief described in plain language, rather than sketched from scratch, can be converted directly into a clean technical flat, which is the exact gap an AI-assisted tool like WOVA is built to close for designers who don't have formal illustration training.
The conceptual sketch and the technical flat serve different jobs and shouldn't be confused. A concept sketch sells the idea, showing mood, fabric drape, and styling context. A technical flat exists purely to communicate construction, with every seam, closure, and topstitch line drawn flat and to proportion, numbered for callouts on the measurement spec. Moving from one to the other is often where a design stalls, because the creative decisions that felt obvious on a mood board still need translating into exact seam placement and closure type before a factory can do anything with them.
How do I choose and source the right fabric for a design?
Fabric choice starts with what the silhouette needs the material to do, not with what's available or cheapest. A design that depends on structure, like a tailored jacket lapel, needs a fabric with enough body and a suitable interfacing behind it. A design that depends on movement, like a bias-cut dress, needs a fabric that drapes rather than holds its own shape.
Composition and weight both matter beyond the fabric's name. "Cotton" alone tells a factory almost nothing; a 100% cotton poplin at 120 GSM behaves nothing like a 100% cotton twill at 280 GSM. Stating exact fibre percentages and GSM in your BOM isn't a formality, it's the difference between a sample that hangs the way you intended and one that doesn't.
Sourcing options generally split into two paths. Working through a fabric agent or mill directly gives more control over minimums and finish but usually requires larger order quantities. Sourcing through your manufacturer's existing fabric relationships can lower minimums for a first run, though it limits your choice to what that factory already has access to. Either way, requesting a physical swatch before committing is worth the delay, since screen colour and printed swatch books rarely match a bolt of fabric under real light.
How does garment fit work, and do I need pattern-making software?
Fit comes down to how accurately a pattern translates a body measurement into fabric shape, and that accuracy depends entirely on how well your points of measure are defined. A POM isn't just a number, it's a named measurement with an exact method attached, so "chest width" measured flat, buttoned, one inch below the armhole means the same thing to every person who picks up a tape measure against your sample.
Grading extends a single base-size pattern across a size range using consistent increments. A half-inch increment per size step at the chest is common for many womenswear ranges, though the correct increment depends entirely on your target market and existing size chart conventions, so check what's standard for your category rather than assuming one figure fits every brand.
Whether you need dedicated pattern-making software depends largely on scale. A small first run with a trusted pattern maker can often work from hand-drafted patterns and a clear measurement spec alone. Digital pattern software becomes worth the investment once you're running multiple styles per season or need to send digital pattern files directly to a factory that expects them in that format, since re-drafting by hand for every style and every size doesn't scale past a certain order volume.
Why does making a muslin or sample matter before full production?
A muslin, sometimes called a toile, is a rough version of your garment sewn from cheap fabric purely to test fit and proportion before committing good fabric or factory time to it. Sewing one yourself, or having a pattern maker sew one, catches problems a flat sketch never reveals: a sleeve that binds when the arm lifts, a hem that pulls unevenly, a dart pointing at the wrong angle for the body it's meant to shape.
The value of a muslin is that mistakes here cost almost nothing to fix. Cut it, pin the correction, note the change on your pattern, cut again. Compare that to catching the same problem on a factory's first sample, where the fix means a new pattern grade, another cutting fee, and another shipping delay before you see fabric again.
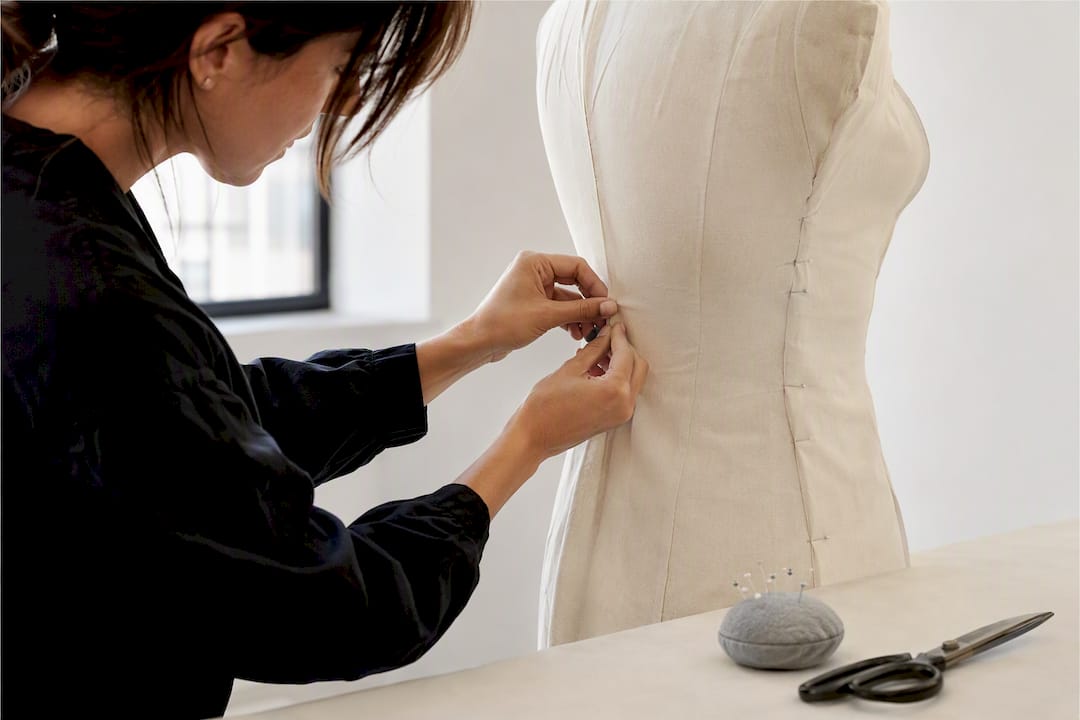
Once the muslin fit is right, the next sample stage moves to your intended fabric, sometimes called a proto sample or first sample, which is what actually goes to the factory for evaluation against your tech pack's measurement spec. This is the sample you'll measure, photograph, and annotate during the revision process described earlier. Skipping the muslin stage entirely and sending a first idea straight to fabric sampling is one of the more expensive shortcuts a new designer can take, because every fit problem the muslin would have caught for free now gets caught on fabric you've paid for.
Get the sequence right, or pay for it twice
Most designers who run into trouble at the factory stage didn't fail on creativity. They moved to fabric and colour decisions before locking the measurement spec and BOM, then had to redo both once the first sample exposed a gap.
Precision on POMs and material specs earns its keep by cutting sampling rounds, which matters more on a small first order than perfect artwork does. Simple spreadsheet templates are fine for a short run; once minimum order quantities grow, or you're running several styles a season, dedicated tech pack tools stop being optional. Documentation load doesn't scale gently. It scales with every extra size, every extra colourway, every extra factory you work with.
— WOVA Editorial Team
Generate your first tech pack draft with WOVA
Some AI-assisted tools can turn a written brief into a working draft faster than starting from a blank technical flat template, producing sketches alongside an initial tech pack draft with flats, a BOM, and POM mapping to build from, as described in AI for e-commerce: Product copy at catalog scale | AmmarAI.

That draft isn't the final word, and it isn't meant to be. Treat it as your starting point: start a free trial, upload a reference garment if you have one, then review the auto-generated pack against your own fabric knowledge and your factory's requirements before it goes anywhere near a cutting table. Verifying tolerances, fabric sourcing, and construction detail with your manufacturer still matters, but you're checking a draft rather than building one from a blank page.
Sources
FAQ
What must a production-ready tech pack include?
It needs technical flats, a complete bill of materials, a measurement spec with points of measure and tolerances, grading rules, construction notes, colourways with Pantone FHI references, label and packaging specs, and a revision history, all compiled into one versioned PDF.
How many pages should a tech pack be?
A standard garment typically runs 8 to 15 pages, with complex styles carrying more pages to cover additional trims, prints, or construction detail.
Why do factories reject incomplete BOMs?
A BOM missing details like thread fibre content, interfacing weight, or trim supplier codes forces a factory to substitute its own defaults, which causes delays and samples that don't match the original intent.
Can AI generate a full tech pack from a design idea?
Platforms like WOVA can produce technical flats, an initial BOM, and POM mapping from a written brief, though material verification and supplier checks still need a human review before submission to a factory.
What's the difference between a muslin and a first sample?
A muslin is a rough test garment sewn in cheap fabric to check fit and proportion before committing real materials, while a first sample is sewn in the intended fabric and evaluated directly against the tech pack's measurement spec.